by Travis C | Mar 9, 2020 | 420 News, AP News, Blog, Business, Culture, Growing
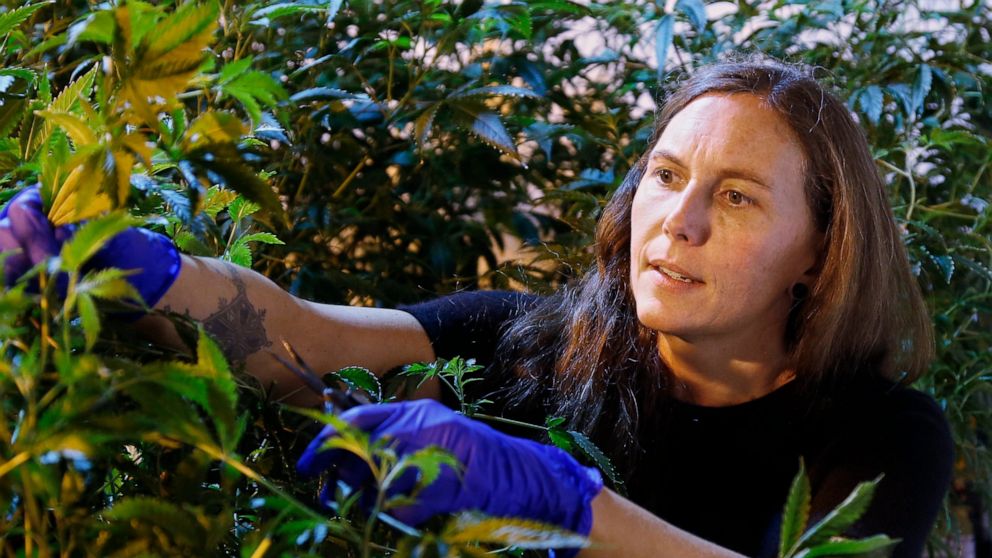
Jessica Baker takes a cutting of a plant at the Baker’s marijuana nursery at Baker Medical, Wednesday, Feb. 26, 2020, in Oklahoma City. When voters in conservative Oklahoma approved medical marijuana in 2018, many thought the rollout would be ploddingly slow and burdened with bureaucracy. Instead, business is booming so much cannabis industry workers and entrepreneurs are moving to Oklahoma from states with more well-established pot cultures, like California, Colorado and Oregon. (AP Photo/Sue Ogrocki)
OKLAHOMA CITY — From their keen taste for sun-ripened pot to their first meeting at a pro-marijuana rally in college in the 1990s, everything about Chip and Jessica Baker fits the stereotype of cannabis country in Northern California, where they lived for 20 years.
Jessica, with wavy hair that falls halfway down her back, is a practicing herbalist, acupuncturist and aromatherapist who teaches classes on the health benefits of cannabis. Scruffy-bearded Chip wears a jacket with a prominent “grower” patch and hosts a marijuana podcast called “The Real Dirt.” They started their pot business in rugged Humboldt County when it was the thriving epicenter of marijuana cultivation.
But the couple bid goodbye to the weed-friendly West and moved somewhere that might seem like the last place they would end up — Oklahoma.
They’re part of a green rush into the Bible Belt that no one anticipated when Oklahoma voters approved medical marijuana less than two years ago. Since then, a combination of factors — including a remarkably open-ended law and a red state’s aversion to government regulation — have created such ideal conditions for the cannabis industry that entrepreneurs are pouring in from states where legal weed has been established for years.
Though 11 states have fully legalized marijuana for recreational use, Oklahoma’s medical law is the closest thing to it: Anyone with any ailment, real or imagined, who can get a doctor’s approval can get a license to buy. It’s not hard to do. Already, nearly 6% of the state’s 4 million residents have obtained their prescription cards. And people who want to sell pot can do it as easily as opening a taco stand.
“Oklahoma is really allowing for normal people to get into the cannabis industry, as opposed to other places where you need $20 million up front,” said Jessica Baker.
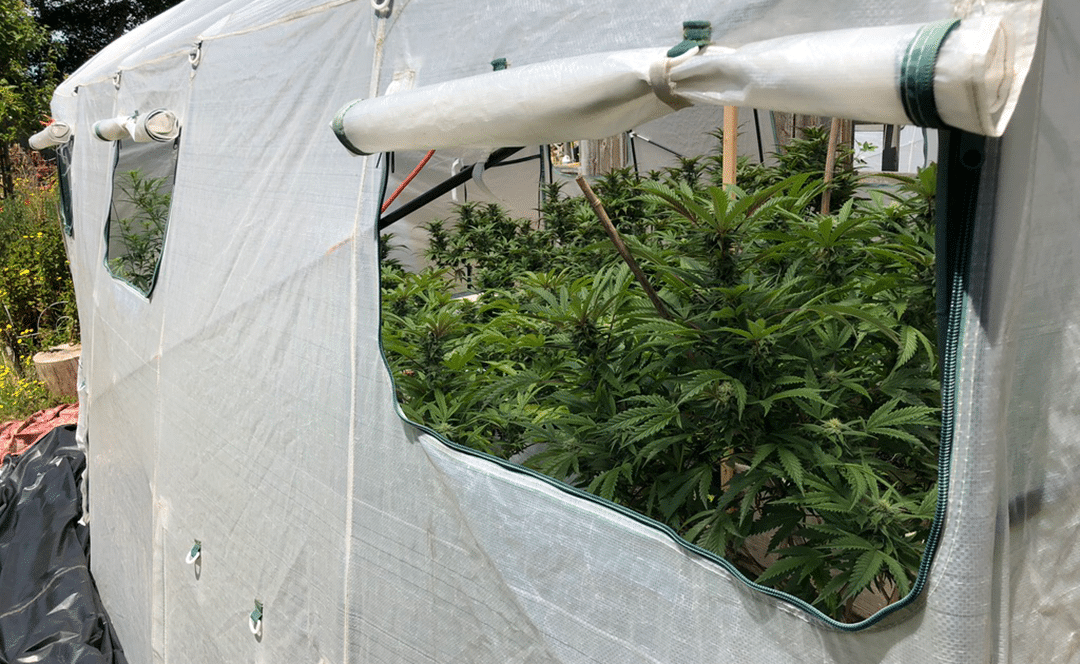
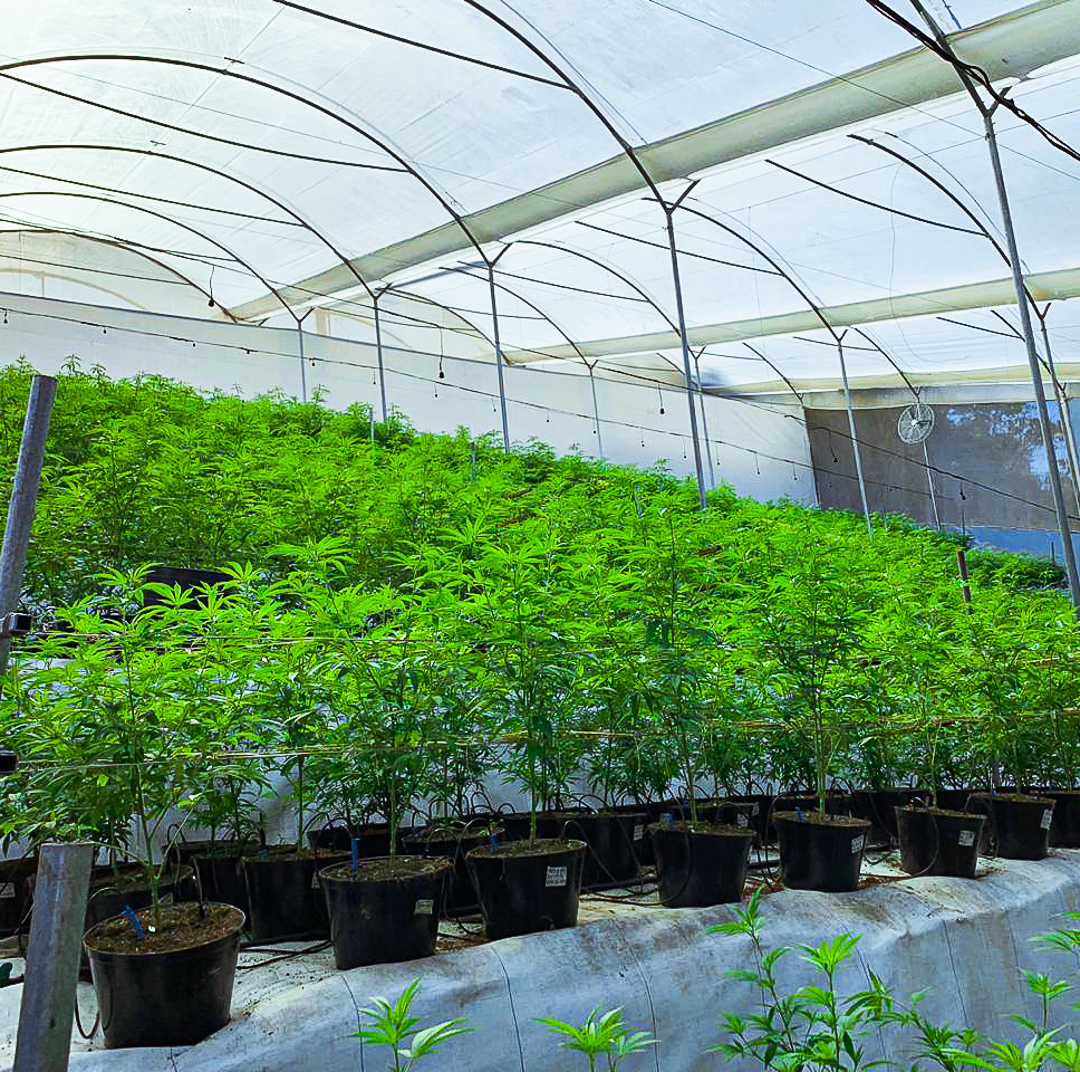
The Bakers have a marijuana farm about 40 miles (65 kilometers) from Oklahoma City, along with a dispensary, nursery and gardening shop in a working-class part of town where virtually every vacant shop and building has been snapped up by weed entrepreneurs in the last year.
When he leased his place, which had been vacant for 10 years, Chip Baker said, “to celebrate, the owner went to Hawaii for a month.”
Unlike other states, Oklahoma did not limit the number of business licenses for dispensaries, growers or processors.
In less than two years, Oklahoma has more than 2,300 pot stores, or the second most per capita in the U.S. behind only Oregon, which has had recreational marijuana sales for five years. Oklahoma has four times more retail outlets than more populous Colorado, which pioneered full legalization.
“Some of these states are regulating cannabis like plutonium,” said Morgan Fox, a spokesman for the National Cannabis Industry Association, the national trade group for marijuana businesses. “And the financial burdens that are placed on licensed businesses are so onerous, that not only is it very difficult to stay in business, but it’s also very difficult for the legal, state-regulated systems to compete with the illicit market.”
Marijuana taxes approach 50% in some California communities and are a factor in some business closings.
California requires a $1,000 application fee, a $5,000 surety bond and an annual license fee ranging from $2,500 to $96,000, depending on a dispensary’s projected revenue, along with a lengthy application process. Licenses can cost $300,000 annually.
In Oklahoma, a dispensary license costs $2,500, can be filled out online and is approved within two weeks.
Arkansas, next door to Oklahoma, also has medical marijuana, but like most such states, it allows purchase only for treatment of certain diseases, such as glaucoma or post-traumatic stress disorder. It also requires a $100,000 surety bond. Louisiana, which also tightly restricts prescriptions, has only nine licensed dispensaries.
Ford Austin and his sister opened the APCO Medical Marijuana Dispensary in a gentrifying part of Oklahoma City after he gave up on plans for a California weed store. “There’s way more opportunity here,” he said.
Sarah Lee Gossett Parrish, an Oklahoma attorney specializing in cannabis law, said about 15% of her cannabis clients are coming from out of state.
“I frequently receive calls from people in the cannabis industry in California,” Gossett Parrish said.
People in some rural towns are worried about the Wild West atmosphere of the boom, particularly where shops with funny weed-pun names, waving banners and blinking signs have opened near schools and churches.
A Republican state legislator, Jim Olsen, has proposed a bill banning dispensaries within 1000 feet (305 meters) of a church. “While I recognize that some people do find pain relief from medical marijuana, with children we really don’t want them to think that when they reach problems in life, that marijuana is a good answer to that.”
But Republican Gov. Kevin Stitt and the GOP-controlled Legislature have shown no interest in reining in the industry since the ballot measure authorizing it passed overwhelmingly. The industry has mostly fought off local attempts at zoning.
Many communities are welcoming cannabis shops because of the sales tax revenue. In college-town Norman and in Oklahoma City, at least a half dozen businesses have joined the chambers of commerce.
“In our community, I think most businesses view them as equals,” said Scott Martin, president of the Norman Chamber of Commerce. “We’ve even had a handful of ribbon cutting ceremonies.”
Marijuana sales generated $54 million in tax revenue last year, accounted for the sharpest ever annual decline in empty mid-sized industrial properties in Oklahoma City, and booked up electricians around Tulsa outfitting new grow rooms with lights and temperature controls.
Even some longtime opponents of marijuana legalization have softened their tone.
Sheriff Chris West in Canadian County, one of many law enforcement officers who decried the 2018 legalization ballot measure, says a number of farmers he knows have decided to switch crops.
“I’ve had them call me and tell me, ‘Sheriff, we’re going to venture into this business and we’d like for you to come out and see our facility, because we want you to know what we’re doing.’ And these are longtime, good, godly, Christian families that see it as an income opportunity.”
by Travis C | Jan 22, 2020 | 420, Blog, Culture, Growing
Whether it’s your first time building out a home grow or you just haven’t bought new gear in a while, budgeting is essential.
If you don’t want any of the advice or details and you just want to know if it’s cheap or expensive to build out your own grow, the answer is yes.
In other words, you can do it the cheap way or you can do it the right way. That’s not to say setting up a grow as cheap as possible can’t work out, but in the end you might end up spending more with all the problems cheap set ups can cause.
Grow Space
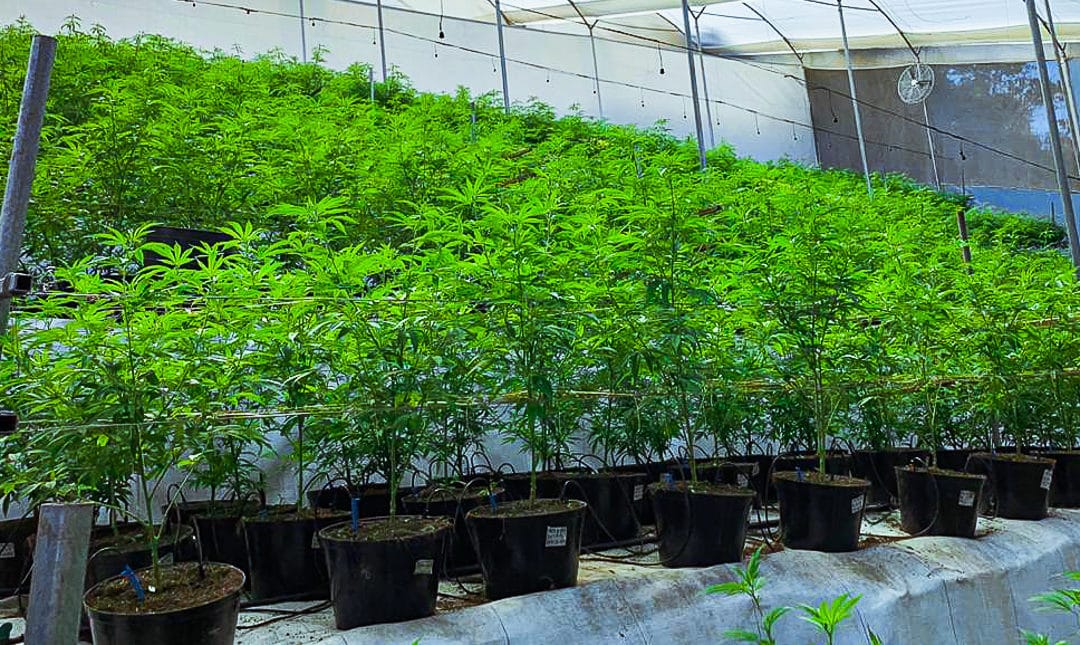
Budgeting out your home grow space is one of the only aspects of home growing that you can potentially save some money on. This is because if you have a nice walk-in closet, or storage space you aren’t using, you have a grow space.
For others without the extra space, you either have to build your own grow space like a greenhouse in the backyard, or you can buy a grow tent. Grow tents make it super easy to get going because they come with holes to pipe in ventilation, reflective walls to help with light, and other features.
If you just have a closet space, you can just as easily line the walls with some plastic and pick up some reflective material to help with light penetration. The size of your grow space will also determine how many pots you’ll be able to fit and in turn, how many plants you’ll be able to grow.
When it comes to pricing out your grow space, you can spend close to nothing, or you can spend a lot. But on the high end, expect to pay a couple hundred for a grow tent or the supplies to build a small greenhouse.
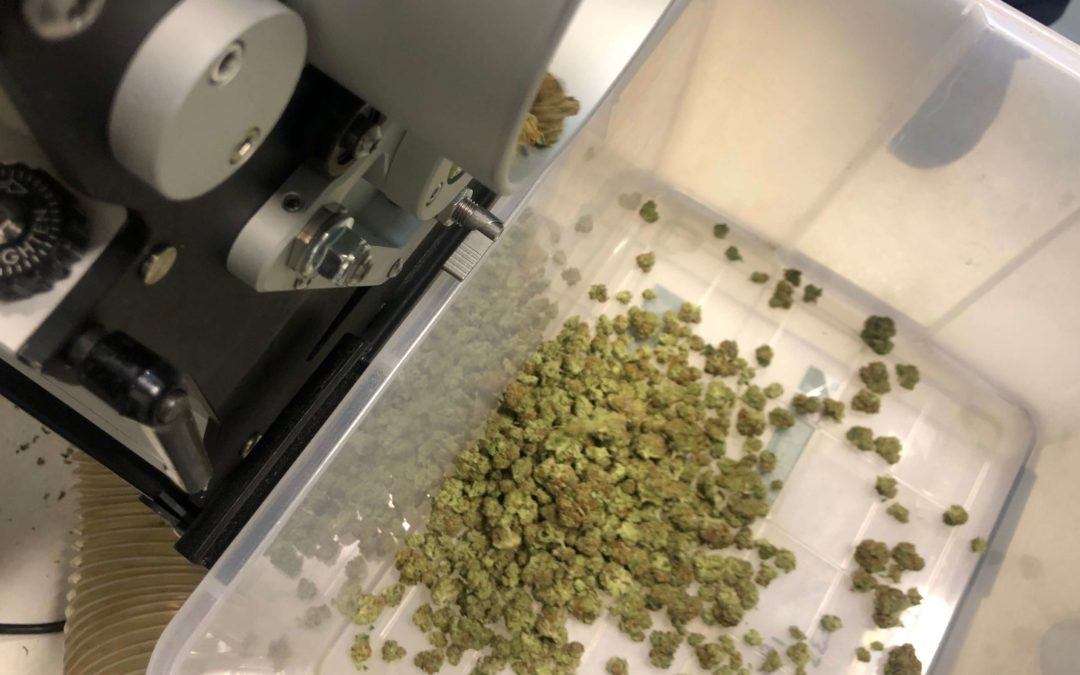
Pots and Medium
You can save a lot of money on pots by using traditional plastic pots. They won’t cost more than $10 for half a dozen depending on the size you want, but plastic has its restrictions.
A lot of growers instead choose to use fabric pots because they provide more aeration and some brands have handles attached for easy transport. If you decide to set up a flood and drain hydroponic table system (if you have the space of course), fabric pots absorb water much better than the few holes in plastic pots allow.
Cost-wise, fabric pots aren’t too much more expensive than plastic pots, only a dollar or so more depending on size. As for mediums, the options are much more varied.
Potting soil is always a good option for your standard grow, especially just starting out. It’s affordable and cost-effective, though it limits how often you can feed, and depending on the soil blend, you may have to adjust pH or other nutrients to account for variations in nutritional content that might already be in the soil.
For this reason, you should consider a soilless medium. Coco fiber and rockwool are two of the most popular soilless mediums currently, mainly because of their inert characteristics that allow growers to feed more often resulting in bigger plants. Also, soilless mediums are typically the cheaper option.
A bag of basic potting soil will typically run you about $15, with higher end blends costing up to $20 or more. Factor in your pot sizes and you can determine exactly how many bags you need to fill all your pots and how much it will cost.
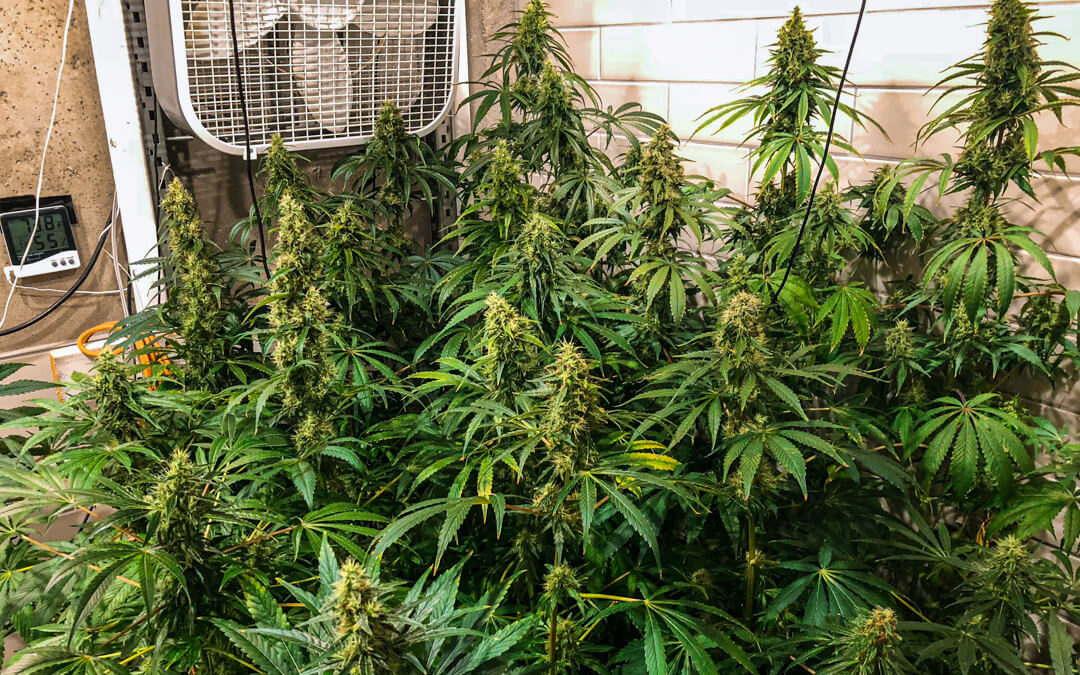
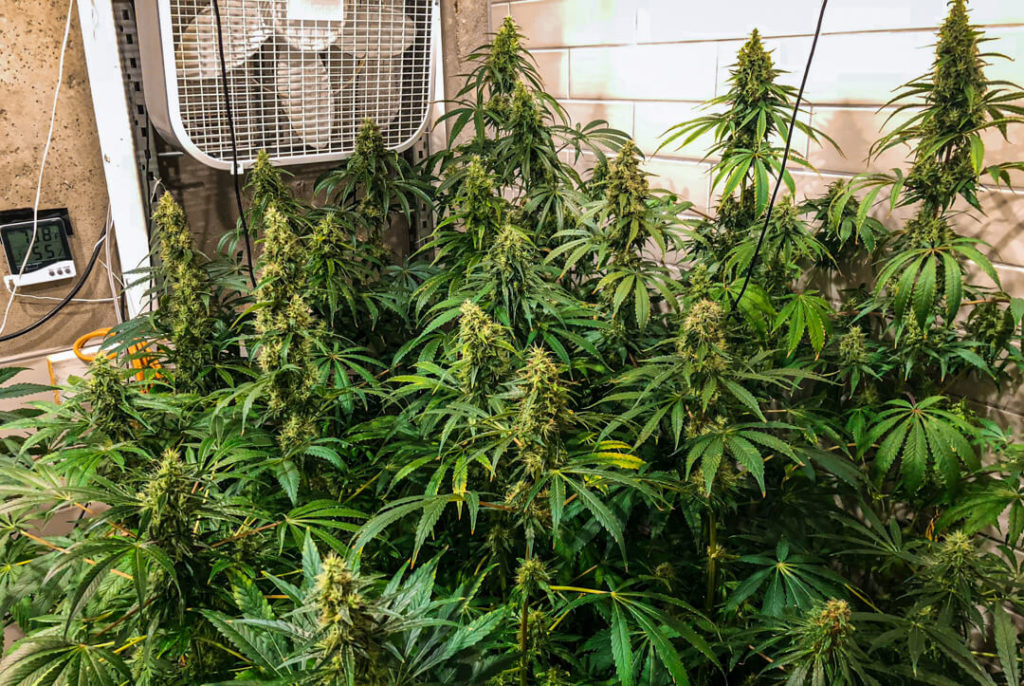
Lights
It might seem like the easy choice to go online, do a google search for some grow lights and pick one of the cheaper options. You’ll save a couple bucks, but the product you receive might end up a little different from the product that was advertised.
A lot of low end lights draw you in with their price point, but once your bulb or ballast stops working after a month, you’re stuck either buying from the same crappy brand, or buying new lights all together. You’ll thank yourself later if you dish out some extra dough for quality lights that will last a long time.
Before picking your lights, you need to calculate your space’s square footage to determine what kind of light would best fit the space. Higher wattage lights will cover a much larger area, and using them in a smaller space won’t help your plants. But you also don’t want to get a light that is too weak and doesn’t provide enough light for all of your plants.
If you decide to go the cheap route, you can get T5 bulbs for vegging your plants, and a 315W for flower without breaking the bank. But for the most effective growth, 1000W Double Ended lights will give the most bang for your buck, with the standard brands coming in around $400-500. Keep in mind if you don’t have the right size space or a means to keep it cool, 1000W bulbs can really heat up your room and damage your plants.
For this reason it’s always wise to invest in some solid ventilation.
Ventilation
When it comes to ventilation there are two essentials every home grow should have, no matter the size of your grow space; a carbon filter and a fan. These two items should never be overlooked when you’re growing at home.
Your plants might like a warm environment, but they don’t like a stagnate environment with stale air. With your lights producing so much heat, you need to move the air around your grow space to prevent overheating. Just having one rotating fan can make a huge difference in keeping your plants and your room cool.
Even if you’re growing the best smelling flowers in the neighborhood, nobody wants their whole house reeking. A carbon filter scrubs the air in your room by pulling it in and cleansing it before releasing it. If you have a closed system where you don’t need to pump the air out, you can recirculate it into your room with a carbon filter.
You can find a few different, quality, small carbon filter options for under $200, with prices rising steadily up into the $300s for larger filters. Fans are also pretty cheap, with 6″ clip-on fans for $20 or less, and higher end large standing fans for $70.
Water
One of the most common mistakes first time growers will make is using tap water to water their plants or mix with nutrients without proper precaution. Tap water contains chloramines, and these chemicals interfere with biological components of nutrients rendering them useless.
If you’re trying to save money and hand water because you only have six plants, that’s just fine. You can even avoid buying a water filter to deal with the chloramines by letting your water sit for 24 hours before mixing with your nutrients. But let’s be real, your plants need to be fed regularly and unless you get on a schedule of pouring water 24 hours in advance in a way that you have a steady supply of usable water, a water filter is the most efficient option.
Starting around $100, a water filter can filter out chlorine, sediment and other chemicals that naturally occur in tap water so you can mix right away without having to wait.
If money isn’t an issue, you can optimize your water and feedings with irrigation. On the cheap end the equipment will run you $500 or more, with the most expensive component being the water pump.
Basic Estimates
If you’ve made it this far, you should know well by now that the costs of setting up your home grow can vary greatly. But we can come up with some rough numbers for getting started from scratch.
If you’re really pinching pennies and just want to get going, you can buy the cheap lights, use whatever grow space you got with plastic pots and hand water, and you’ll still be looking at around $300 when all is said in done. For the average grower with a little more change to spare, $500 can really boost what you can get and help you get started on the right foot.
Of course there’s really no limit to how much you can spend to get the best gear for your home grow. If you’re really serious of growing and want to transition into a professional environment eventually, it’s smart to grow with good gear so you can advance your craft. Just remember that it won’t come cheap!