fbpx
What is Topping? How to Top Cannabis

What is Topping? How to Top Cannabis

what is cannabis topping?

High quality yields are the goal of every grower. Topping your plants can be an easy way to increase your plant’s development for great results.

The process of topping is just about as simple as the name implies; cutting off the top of your plant. Sounds crazy right?

It makes sense when you think about though. Certain plants have a growth pattern that makes them grow taller, with a focus on a central flower.

While other smaller flowers may develop underneath the main flower, they won’t be as vigorous or strong due to the energy focusing on the top of the plant.

While this isn’t the case with all varieties of flowering plants, when you’re growing a plant with tall vegetative growth and a centralized growth pattern, you can benefit from topping.

What is Cannabis Topping?

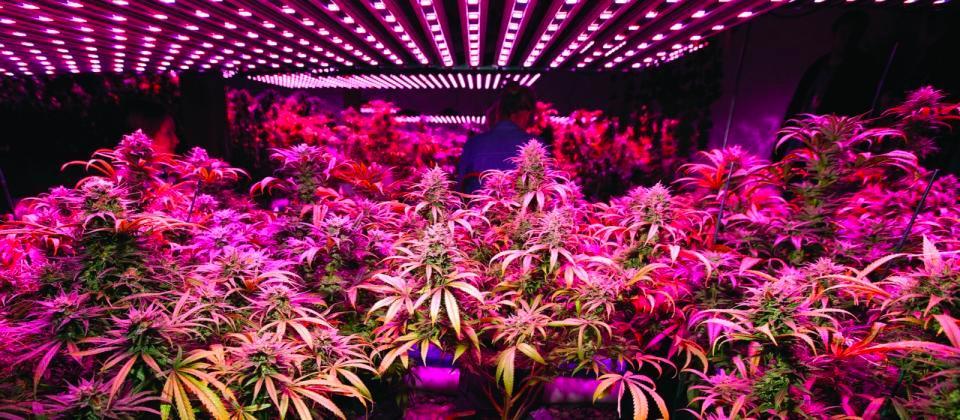
Topping your plants might sound as simple as chopping off the top portion of your plant, it is a little more in depth than that. If left to grow on its own, a cannabis plant will grow vertically, focusing its energy on one main stalk.

The result is one long dominant cola with smaller stalks surrounding it. These smaller stalks will produce small, larfy buds that won’t be that good and the overall size and yield of the plant will be small.

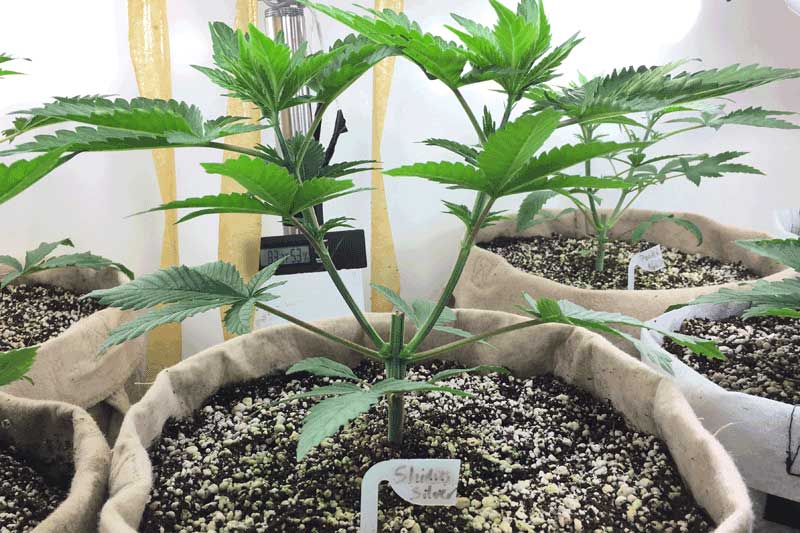
Topping makes a cannabis plant bushier—by cutting off the main stalk, the plant will redirect its energies to the smaller side branches, which will grow out. If you let a cannabis plant grow naturally, it will usually grow one main stem, but if you top the plant when it’s young, you can cause it to grow multiple colas in basically the same amount of time!

During the vegetative stage of your plants’ growth cycle, cutting off a specific portion of the top of your plant can focus more growth hormones to the lower half to a more lush and even canopy.

After being cut, your plant will use more energy to regrow its central flower, and a portion of that is distributed throughout the rest of the plant.

How to Top Cannabis

For your first time topping cannabis, a good rule of thumb is to cut the plant above the 5th node of your plant, between the 6th and 7th node ideally. Doing so will give you enough branches on the bottom for your plants to bush out properly.

If you top lower than the 6th, you are going to be cutting away a significant portion of the upper growth on a plant.

If you want to continue toppings on the same plant, be sure to cut each branch above the second or third node to allow the plant to grow out properly. These toppings are more subjective, and will depend on how much you want the plant to bush out and how big you want the final plant to be.

When you top the plants, you are completely removing the upper growth. No new growth will develop from the growth tip that has been cut. This allows the lower lateral growth to assume the dominance.

Since there are two growth tips at each node, you effectively double the number of dominant growth tips every time that you top the plant.

Why You Should Top Your Cannabis

The benefits of topping are self-evident. If you compare a plant that is topped to one that is left to grow normally, the topped cannabis will always have bigger yields, more colas, and more flowering nodes than the plant left alone.

Topping cannabis helps focus more energy where your plant needs it most, and topping allows more light to hit portions of your plant that may have been blocked by their tops originally. As a form of Low Stress Training (LST), topping cannabis is one way to take more control over your plant’s production without seriously risking the plant’s health.

Unless you do it completely wrong, topping is an effective training method to produce bigger yields. Who doesn’t want that?

The History of Grow Lights and the Rise of LEDs

The History of Grow Lights and the Rise of LEDs

led lights for cannabis

Lighting for indoor plant cultivation has evolved exponentially over the last twenty years.

A focus on creating the most cost-effective grow light has led to new technology and lighting applications that boost yields and produce way higher quality plants. 

As long as electricity has existed, people have likely tried growing plants indoors. However most had no luck, as the power of lights back then was so minute compared to the power of the sun that growing indoors didn’t make any sense to the average farmer.

Jump ahead a couple hundred years and into the 20th century, and everything began changing. Cultivation techniques advanced, and so did technology.

The History of Grow Lights

The first patent for the next evolution of grow lights would be for the Metal Halide bulb, patented all the way back in 1912! But it wouldn’t be until the 1960s that this invention saw more practical, widespread use for cultivation. At this same time in 1962, LED lights would be invented. Remember this for later.

The metal halide bulb would act as the catalyst for the beginning of grow-light technology innovations, with High Pressure Sodium lights coming into the fray only four years after Metal Halide. With a higher wattage capability and stronger light spectrum, HPS lighting became the industry standard for decades.

However at this point, most growers were still just hanging bulbs from their ceilings. Also, the only bulbs available were 600 Watts or 1,000 Watts.

More innovation followed the introduction of HPS lights, like ballasts and reflective hoods to increase coverage and power and Ceramic Metal Halide bulbs in 1994, but in 2010 everything changed.

Gavita Lighting International invented the Double Ended Light Fixture in 2010, followed by the first Double Ended 750 Watt HPS Bulbs in 2013. This innovation completely revolutionized the way people could grow indoors, multiplying yields and quality exponentially.

Through all this innovation and technological advancement, LED Lights were slowly gaining steam in the background. Used primarily for home or commercial lighting, over the last decade LED lights slowly began breaking into the agricultural industry.

With more developments in LED tech over the last ten years, fixtures have been created that are now viable for commercial scale indoor cultivation. As innovators in the lighting industry, Gavita released their state of the art LED grow light in 2019 to revolutionize indoor cultivation yet again.

We are now entering what some would say is an infancy stage for LED grow lights. They are growing in popularity among home growers, but commercial and large scale growers are slower to see the appeal. Pair that with a high price point for quality LED lights and its easy to understand why they aren’t widespread quite yet.

Are LEDs Worth the Price?

While LED lights for cultivation are becoming more mainstream and effective, they definitely aren’t the cheapest option. CMH and HPS lighting have been the industry standard, which means more companies have produced economical options for growers at all levels.

Because LEDs have yet to become commonplace, the two options for growers are well-made lights that are proven to work from companies like Gavita for a higher price tag, or cheap, low quality LEDs typically produced in China. For the indoor grower with just a few plants, a cheaper light can get the job done, and it won’t break the bank when you need a new one after it inevitably breaks or malfunctions.

While a large scale grower can greatly benefit from using LED lights and they may even pay themselves off in time, a lot of cultivators can’t justify the high price point when HPS and CMH lights can do a great job for cheap in comparison. Over time the prices of LEDs will drop just like HPS did, and in a few years they will be just as common for growers, hopefully!

How to Prune Your Cannabis

How to Prune Your Cannabis

how to prune cannabis plants

Plant pruning is an essential tool for keeping your plants healthy and keeping energy focused to the parts of your plant that need it most.

If you don’t prune your cannabis plants, the small branches and leaves under your canopy can steal that energy away. It might seem wasteful to cut off any part of your plant that looks like it is growing fine, but it can actually be the opposite.

Why Prune Cannabis?

When your cannabis plants are young and just starting their vegetative stage, they’re small and it’s easy for light and air to penetrate every part of your plants. But that changes as they grow.

As your cannabis grows taller and wider with vegetative growth, the canopy that develops can start to take the majority of light away from the lower portion of the plant. This means that branches, leaves and even potential flower sites can’t get the light they need.

Additionally, as your plant grows thicker and forms a canopy, it becomes difficult for air to penetrate and pass through the whole plant. This causes the lower parts of your cannabis to get stuck in pockets of warm air with little light, and that’s no good.

Pruning your cannabis is simply just getting rid of the parts of the plant that aren’t going to produce flower or benefit the plant going forward as it grows.

How to Prune Cannabis

You can maintain regular basic pruning practices with just your hands, but to really have an impact, you’ll want to use a pair of trimming scissors and have a pair of shears on hand in case you run into a tough branch.

Before you break out the scissors, check your plants for dead leaves, withering leaves, and leaves lower on the plant that aren’t receiving light. Remove these leaves by hand to get a better view of your plants throughout to see the branches and flower sites you might want to remove.

Next, beginning at the bottom of your plants, you want to looks for branches that are growing upward and underneath the canopy. Due to their growth pattern, these branches will never be able to get the light they need to produce harvest-worthy flowers and be cut out.

There may also be flower sites that have formed directly on the stem of your plants. You want to snip those off too.

By cutting out these branches and lower flower sites, your plants will focus more energy on the tops of your plants, producing bigger, better flowers up top.

Don’t Prune Later in Flower

While you can (and should) prune your plants regularly throughout their vegetative stage and early into the flower stage, you will want to cease pruning when they get three to four weeks into the flowering stage.

Cutting off portions of your plant later in the flower stage can reactivate vegetative growth from the sites you cut. Needless to say, if vegetative growth starts up in your flower stage, it’s going to take extremely valuable energy away from your flower sites at the top of the plants.

Best Cannabis Root Supplements

Best Cannabis Root Supplements

best cannabis root supplements

The fastest way to plant your cannabis isn’t always the best, and just putting your plants into the ground and giving them water doesn’t always get the best results.

Just about every ganja grower is planting their outdoor cannabis over the next few weeks if they haven’t already. Especially if you’re growing from clones that you got started inside, you need to take extra precautions to make sure they don’t suffer from transplant shock or rooting issues once you move them to a new outdoor medium.

There’s a few different products we like to use at The Real Dirt that have been tried and true over the years. These are proven root supplements that yield great results, from thriving root zones with fat, healthy roots to lush vegetative growth that gets your plants primed for flowering. If you have other root supplements you love to use, comment at the bottom of this post what your favorites are!

What is a Root Supplement?

To get the basics out of the way, when it comes to plant health and development, there’s three major nutrients that plants need, and you probably already know them: Nitrogen, Phosphorus and Potassium (NPK).

But NPK isn’t all a plant needs to thrive, and supplementing other micronutrients and beneficial bacteria with your regular nutrients can boost plant development during specific stages. When you want to boost your plant’s root health so they grow bigger and stronger – which will always leader to bigger and stronger plants above ground – you use root supplements.

Best Root Supplements

Here’s our top three root supplements that you should try out.

Elite Root Ignitor

Elite Root Ignitor root supplement

Engineered to perform, Elite Root Igniter is specifically formulated to increase root mass. Like the foundation of a house, a root mass that is thicker and spread evenly will provide stronger support.

This translates to lower stress levels on your cannabis and more effective absorption of both water and beneficial nutrients. Simply put, more root mass is better!

This formulation is a state-of-the-art liquid mycorrhizal inoculant. Mycorrhizae, a species of beneficial fungi, are scientifically proven to increase root mass, and lessen the damaging impacts of medium toxicity.

General Hydroponics RapidStart

general hydroponics rapidstart root supplement product

RapidStart enhances your growing experience by delivering a powerful blend of premium plant extracts, amino acids, and nutrients generating explosive root growth.

This root supplement stimulates prolific root branching and development of fine root hairs that increase nutrient uptake and grow healthier, whiter roots.

Using RapidStart will make your plants explode! And you can use it during the entire growing cycle in all types of growing media, including coco.

Botanicare Rhizo Blast

botanicare rhizo blast root supplement plant product

Rhizo Blast from Botanicare is a powerful root developing tonic that boosts root growth.

Their proprietary formula contains a blend of seaweed, single-celled algae and other mineral nutrients that help generate robust root growth while maintaining a strong rhizosphere.

Strong Roots = Strong Plants

That’s what it all comes down to in the end. Some plants have naturally strong roots that will spread throughout your soil rapidly. Others might need a little help in the beginning to get going.

But with a root supplement at the beginning and throughout your growth cycle in addition to your regular feeding regiment you can create a massive, strong and healthy root zone that will be visible in your plant size, durability and yields.

How to Brew Compost Tea

How to Brew Compost Tea

Growing organically should be the eventual goal of every grower, and brewing your own compost tea is the first step.

For most, growing “organic” is a lot easier said than done. At first it might seem like there’s a plethora of organic nutrients out there that do the same thing as synthetics. But a brand name and even a label isn’t always honest.

There are dozens of nutrients, fertilizers and other plant products that might have “organics” in the name, but this doesn’t guarantee the product itself is organic. But you can avoid a lot of the false marketing by starting your organic grow with a compost tea.

What is Compost?

If you grew up with a pile of food and vegetable scraps in the backyard, you’re already familiar with compost. Compost is simply just organic material that is combined together to produce a breeding ground for beneficial microbes and bacteria.

A healthy compost tea pulls the soluble nutrients and microorganisms from compost; this includes bacteria, fungi, protozoa, and nematodes. Nematodes do not have a life cycle that is rapid enough to increase their population in the time it takes to brew a tea.

However, bacteria, fungi, and protozoa can all increase their populations with the right foods and conditions. Once you’ve got the right mix you want for your compost, you can begin mixing your tea.

How to brew compost tea

Compost tea is literally just that, tea. Like you would brew up a cup of tea with a teabag, you’ll want to put your compost into a fine micron bag to ensure it doesn’t spill into your water while it is brewing. But before you add anything to anything, you need to make sure your water is aerated with an air pump. This is important especially if your water source is chlorinated, as aerating your water will remove it.

Once you’re ready to start brewing, you’ll want to use roughly 5 pounds of compost for every 25 gallons of water. In addition to the compost you add in, there are other beneficials you can add to enhance your compost tea.

You can add in 1–2 tablespoons of humic acid and dilute it in 2 cups of water before adding it into the tea. You can also use 1–2 tablespoons of fish hydrolysate as an alternative. Now go ahead and mix ½ cup of kelp into 5 cups of water. Once adequately mixed, add this into the compost tea for a highly nutritious punch.

Once you have all your ingredients together and your compost is in the water, all you need to do is wait. Ideally compost tea will take 24-36 hours to complete brewing. Make sure you keep an eye on the temperature of your water, as temperature is essential for the development of bacteria and fungi.

The optimum temperature for healthy compost tea is between 65-85 degree Fahrenheit.

Applying your tea

There are two popular ways to apply your compost tea to your plants. The simplest option is to use the compost tea as a soil drench, applying it during your regular feedings for optimal nutrient uptake.

The other option requires a little more gear, and that’s applying your compost tea as a foliar spray. With a sprayer you can walk the grow and spray down your plants making sure they are completely covered. Doing so can put beneficial fungi and even predatory nematodes on your leaves to protect against predators.

And that’s about it! When it comes to making compost tea, the most essential ingredient is obviously the compost. Make sure your compost is fully developed and not still breaking down the organic material within. It should look and smell like fresh soil from the earth when it is ready to use in a tea. And there is always more you can do to produce healthier, more beneficial compost.

You can also greatly simplify the brewing process by using a compost tea brewer. While these can be expensive, The Real Dirt is working with Cutting Edge Solutions to provide an incredible deal on their 15-gallon and 35-gallon brewers. When you buy a ticket to our Organic Cultivation Seminar, you can save over $500.00 on these compost tea brewers, all included with a full-day seminar on organic cultivation.

Everything from the basics of organic cultivation, to building your own organic soil and brewing compost tea efficiently will be covered at this seminar, all for an incredible price.